Thank you teacher card DIY
Soon…the end of the school year, the summer holidays and the time we say goodbye and thank you to all the great teachers, who have cared for our kids. We’ve got the perfect personal thank you teacher card DIY. It will not only make their favourite teacher happy but also keep the kiddos occupied inside, in this heatwave.
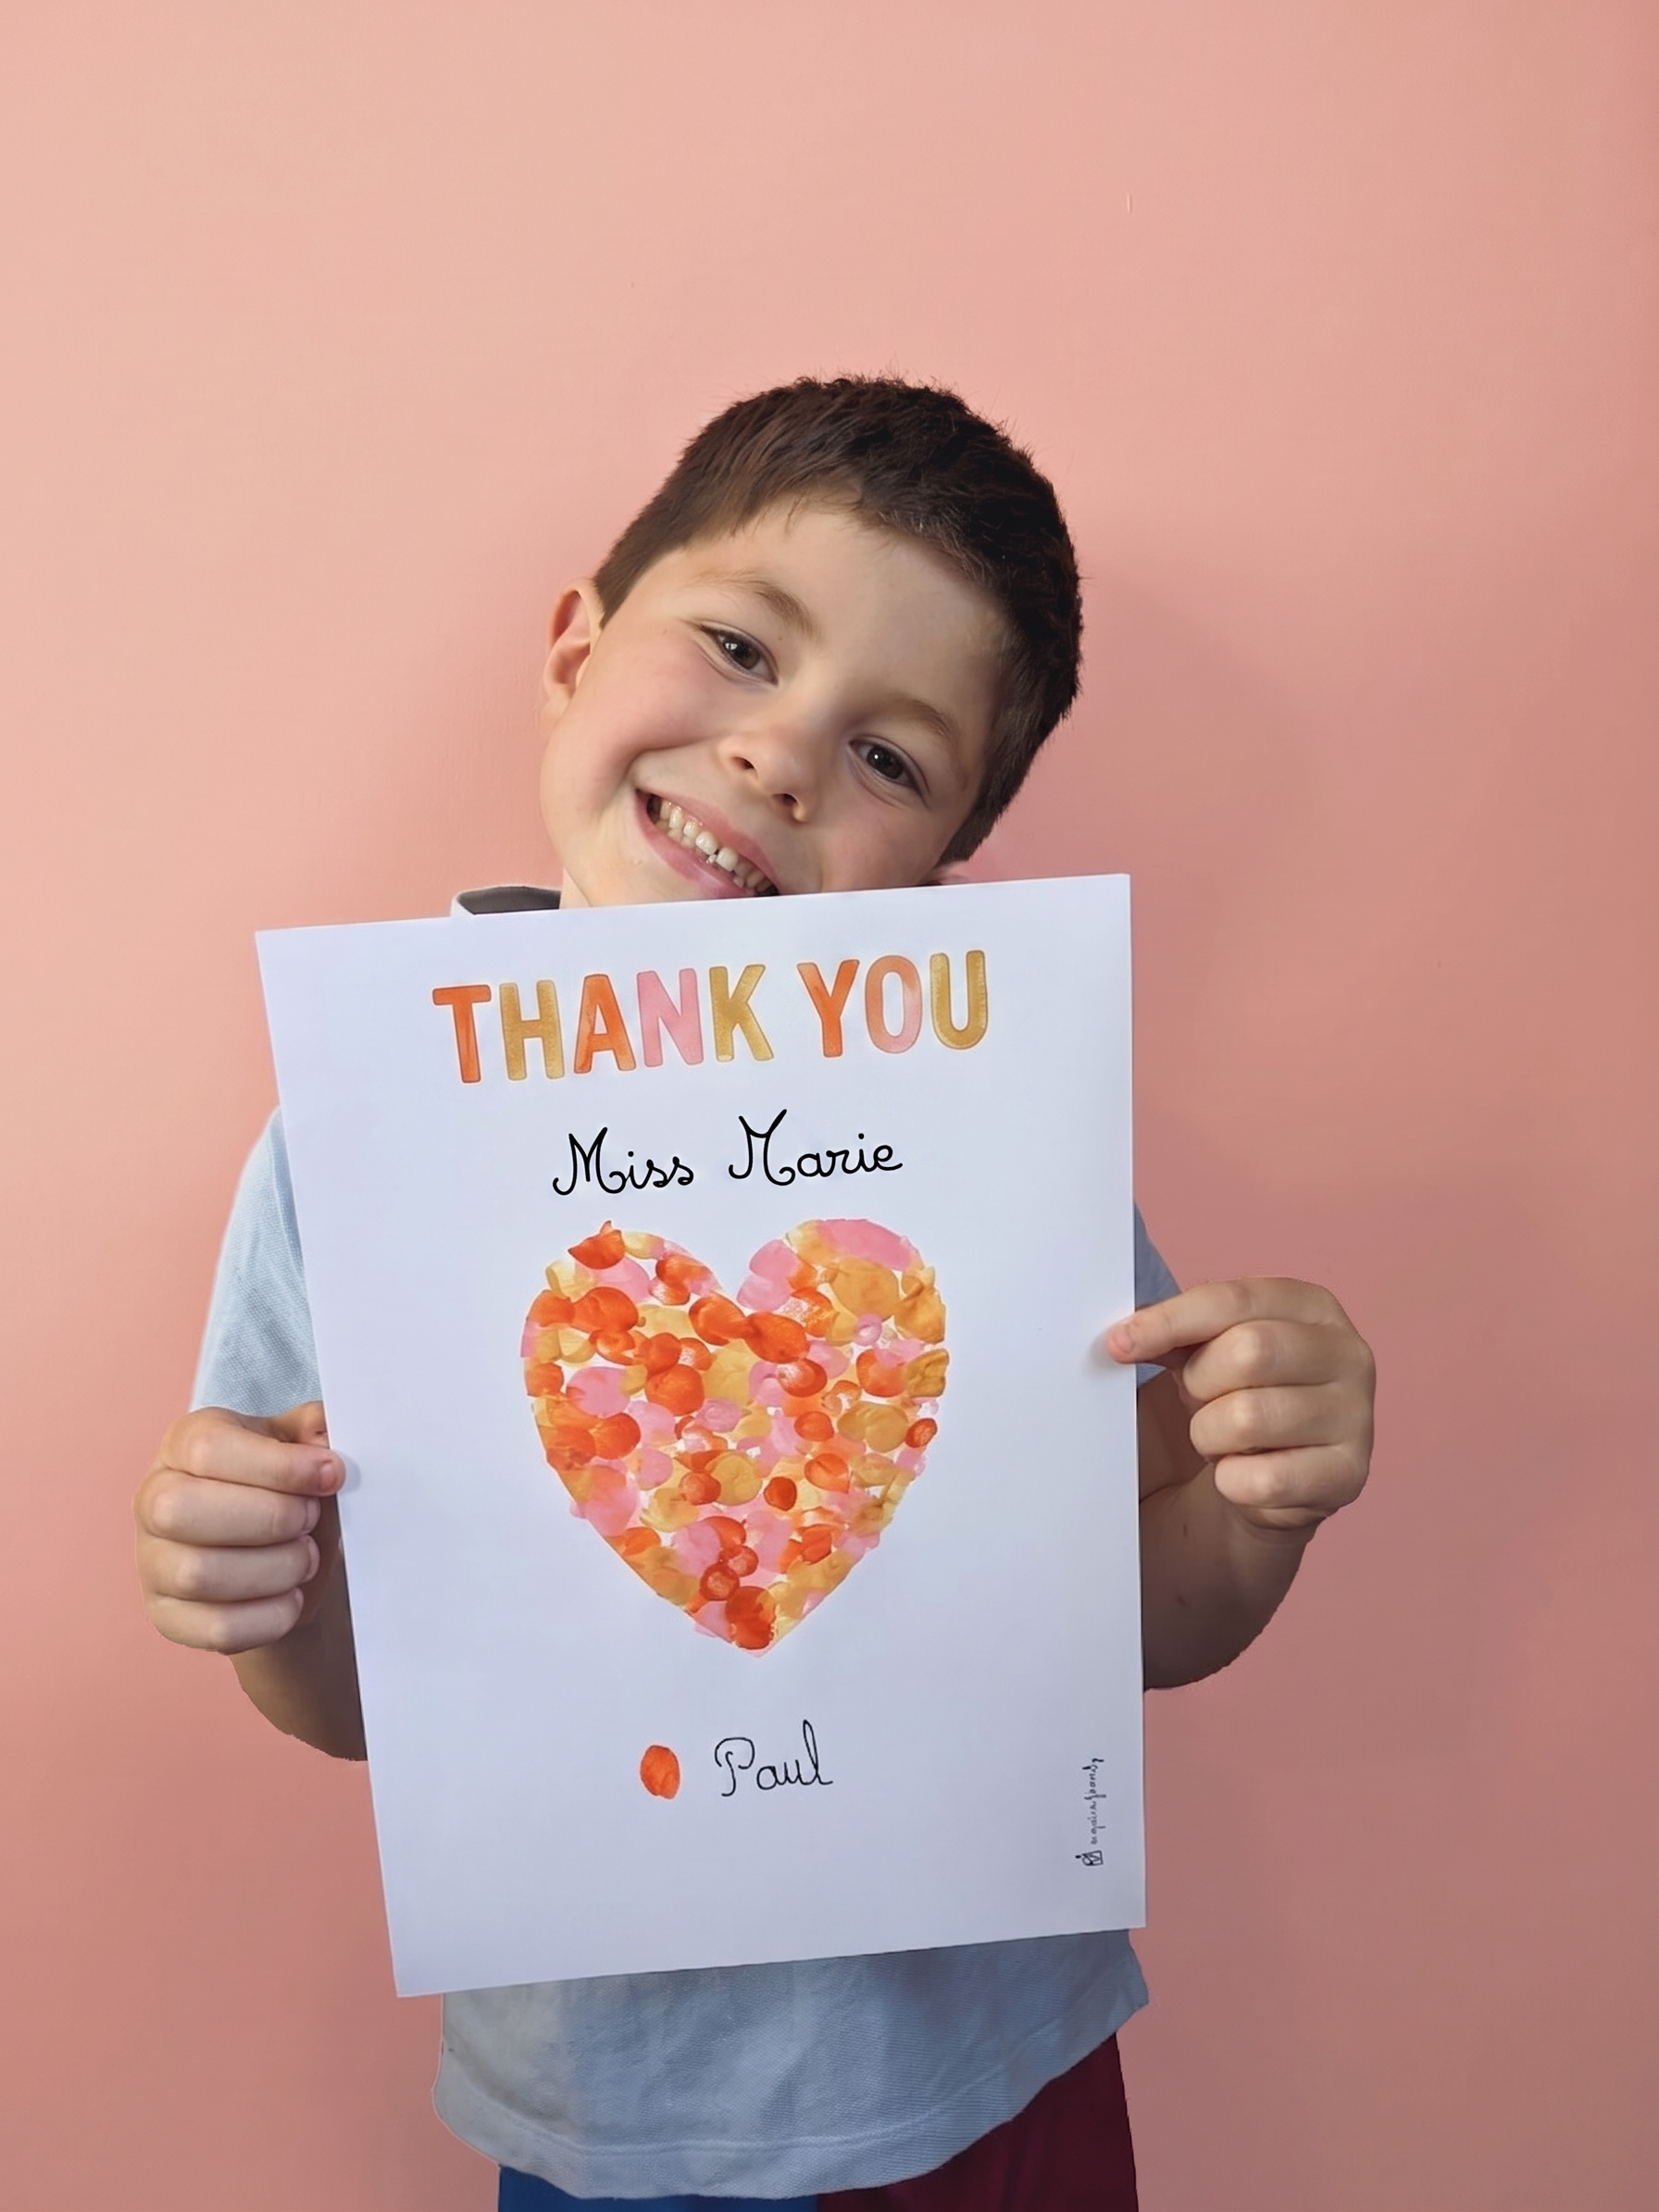
Every year, the same question arises: what is the best Teacher’s gift? How best show our appreciation for all the hard work and dedication they have put into? The Mine4Sure team has come up with a few teachers gift ideas, starting with a free printable to say Thank You! Just download and complete.
Of course, a box of chocolates or a bag of goodies is always appreciated but, all teachers will agree, they’ll love even more a true personalised note.
Download your “Thank you” card free printable here
Necessary material for your Thank you teacher card DIY
Start by downloading the template and stencil as shown above.
Thereafter, you will need:
- A couple of white sheets of paper or thin card
- A pair of scissors
- Sticky tack
- Some finger paints. You can of course pick any colour you want.
- A recipient or small plate for each colour
- Felt tip coloured pens
- And last but not least, the kiddos fingertips!!
Making the card DIY
To start, get the children decide which colours they want to use. You can follow our example, choose their mummy’s favourite colours or their own preferred ones.
Next, they can colour the letters “Happy Mother’s Day” using colouring pens or the paints, it’s up to you/them.
Then they can complete the sentence below with Mummy, Mama, Mother, Mom … for example
The next step is to hollow out the heart stencil. Remove the hashed inside part.
This sheet will serve to fill in the heart with the children’s fingerprints.
Now that you have hollowed out the stencil, place this sheet on top of the other sheet with the text. Secure it in place using blue tack or masking tape, for the time it takes to make the imprints.
Now, for the FUN part! If it is not already done, get each child to choose the colour paint they want. Here Emily picked pink, Alfie blue and Lottie orange.
Taking turns, they dip their fingertips in the paint and make an imprint inside the heart.
The idea is to fill in the heart with a mix of their colours.
To prevent colours from mixing too much, make sure the paints aren’t too runny and don’t hesitate to let it dry a bit before adding more imprints.
Fill in the heart shape completely. Let the paint dry for at least 10 minutes before lifting the stencil to prevent the paint from running on the card part.
Now, every masterpiece needs to be signed! The children can add their fingerprints below the heart in their chosen colour and write their name next to it.
+ There are no comments
Add yours